Welcome to our fourth edition of “Really Bad Real Estate Photos” where you’ll see the worst of the worst in real estate marketing photos.
If you’ve missed our previous editions of Really Bad Real Estate Photos take a look at them here:
- Panoramic Real Estate Photos Are A Tragedy
- Are You Selling The Home or The Flowers?
- This Home Is Staged With A Creepy Teddy Bear
Usually on “Really Bad Real Estate Photos”, we present three real estate marketing photos we’ve found on the web that needs a second look of touch up work. For this edition, we’re going to only focus on one that has the most common mistake most real estate professionals make when taking property photos, tilted photos. As a bonus, we’ll even write our recommendation on how to improve these photos using our Rental Property Marketing Guide.
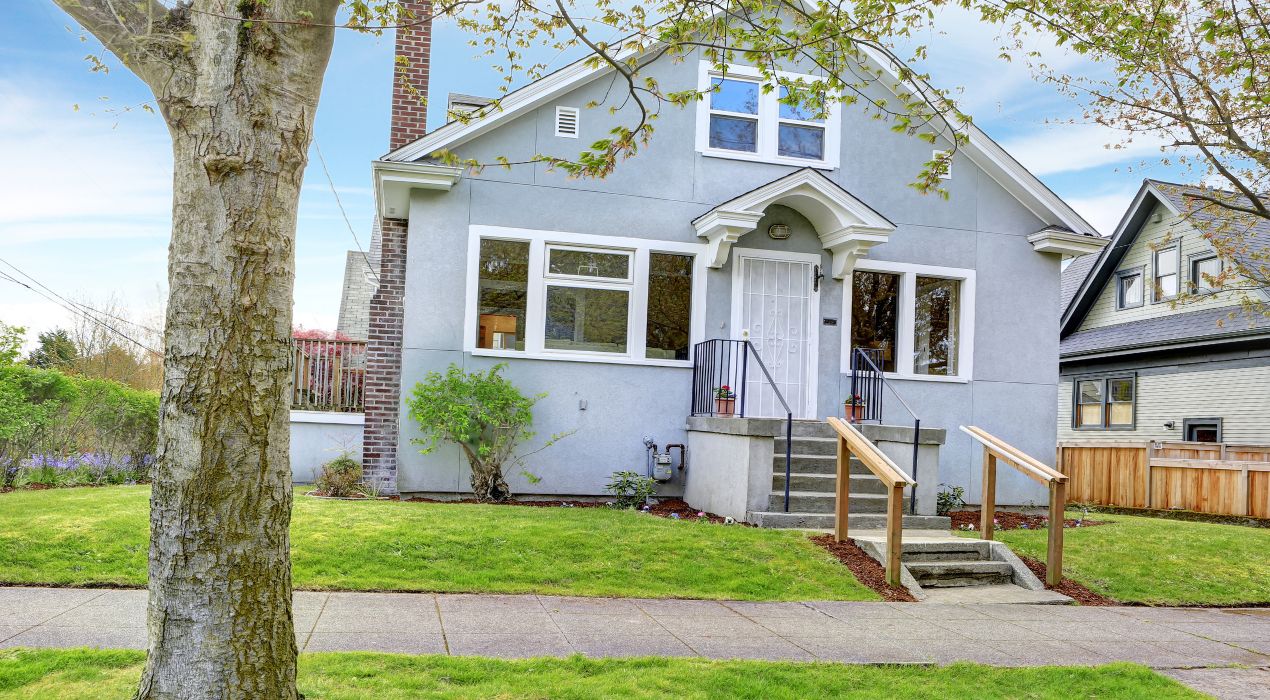
Tilted photos, also known as crooked photos, is a common problem but can be easily fixed. We’re going to show you how to fix tilted photos before taking the photo and after.
How To Fix Tilted Photos: Before The Shot
Using On Camera Grid Lines
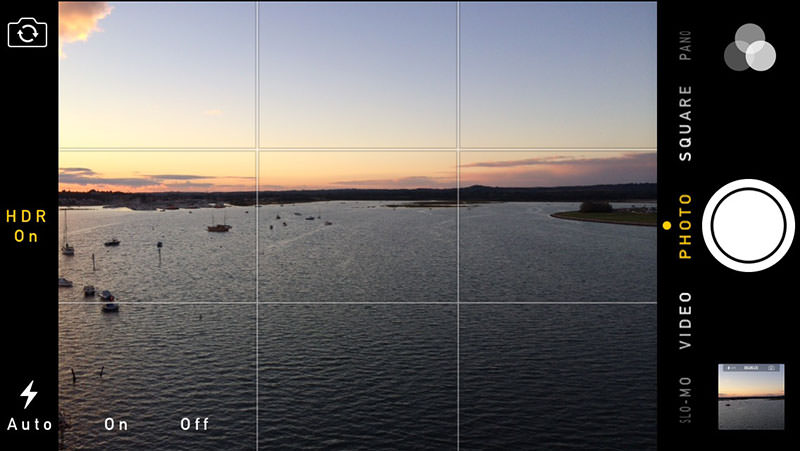
Using grid lines is an easy way to fix tilted photos on a smartphone, point and shoot camera, or DSLR. By enabling grid lines, two horizontal lines and two vertical lines will be equally placed over the display. These lines help you square up the horizons and floor in your photo.
These lines do not show up in the final photo.
Enable grid lines on your iPhone by going to the settings app, tapping Photos & Camera, then toggling the Grid switch on. Return to your Camera app and you are ready to shoot!
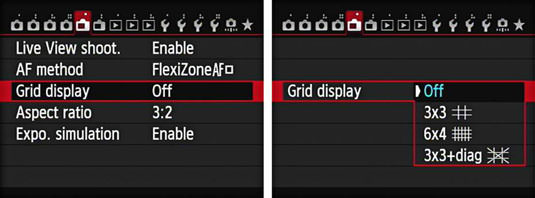
Grid lines on a DSLR are just as easy.
Sometimes grid lines show up in the DSLR viewfinder. Other times it doesn’t. Almost always, it can be enabled in Live View mode on the DSLR.
For most Canon DSLRs, grid lines can be accessed by going to menu, then using the multi-controller dial to navigate to the Live View Shooting Setting Tab, then highlighting Grid Display and pressing set to enable a 3×3, 6×4, and 3×3 with diagonals. Press set and start shooting in Live View!
On a Nikon DSLR, you’ll need to first enter Live View, then press the Info button to cycle through display options, which show movie indicators, hide indicators, and the grid view.
Then start shooting!
How To Fix Tilted Photos: After The Shot
iOS Photos app
Let’s say you just took a set of photos. After arriving at your office, you noticed it’s tilted. Calm down, you’re not screwed.
You can still fix tilted photos through the Straighten feature on the iOS Photos app. Go to your photos and select the photo you want to edit.
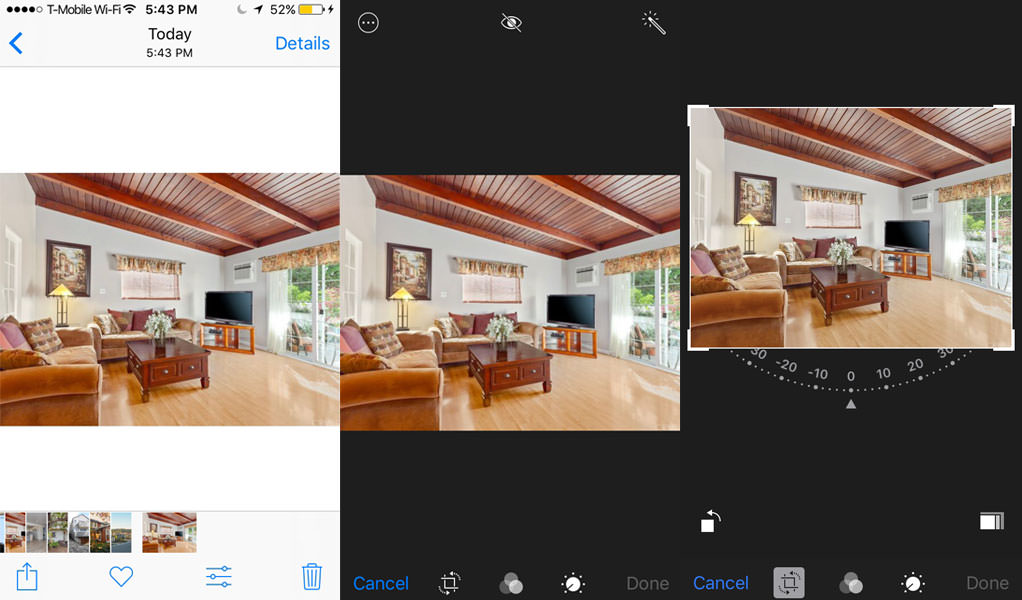
On the bottom panel, tap the icon that shows the “3 levels”. This brings you to the photo editor. Tap the  crop tool, which allows you to straighten out your photo to your liking. If the app detects a horizon in your photo, it will straighten the photo automatically.
Adobe Lightroom
Adobe Lightroom is a professional paid photo editing software created by Adobe Systems, the same company that makes Photoshop.
To fix tilted photos in Lightroom, start by importing your photos. Go to the Develop panel and find the Transform effects window.
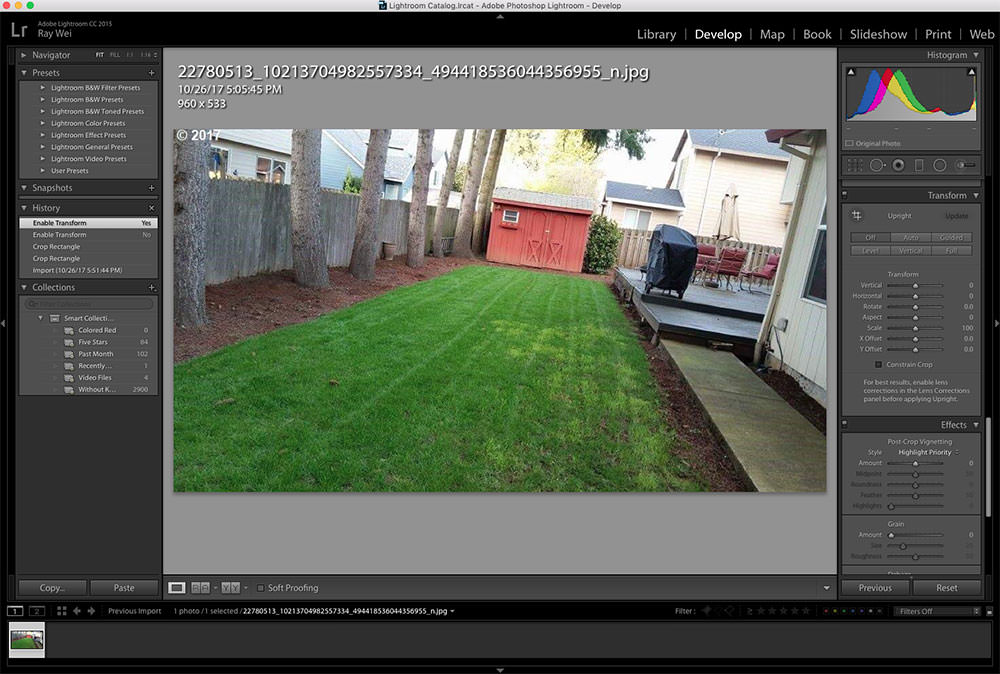
For a quick edit, click Auto.
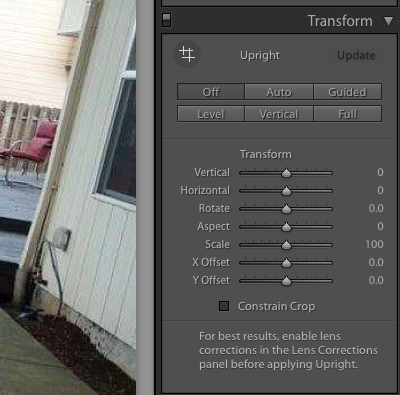
Depending on how severe the tilt is, you photo may need cropping. Click the Constrain Crop tool so that your photo fills up the frame. Export the images by going to File and then Export.
Your photo is now straightened!
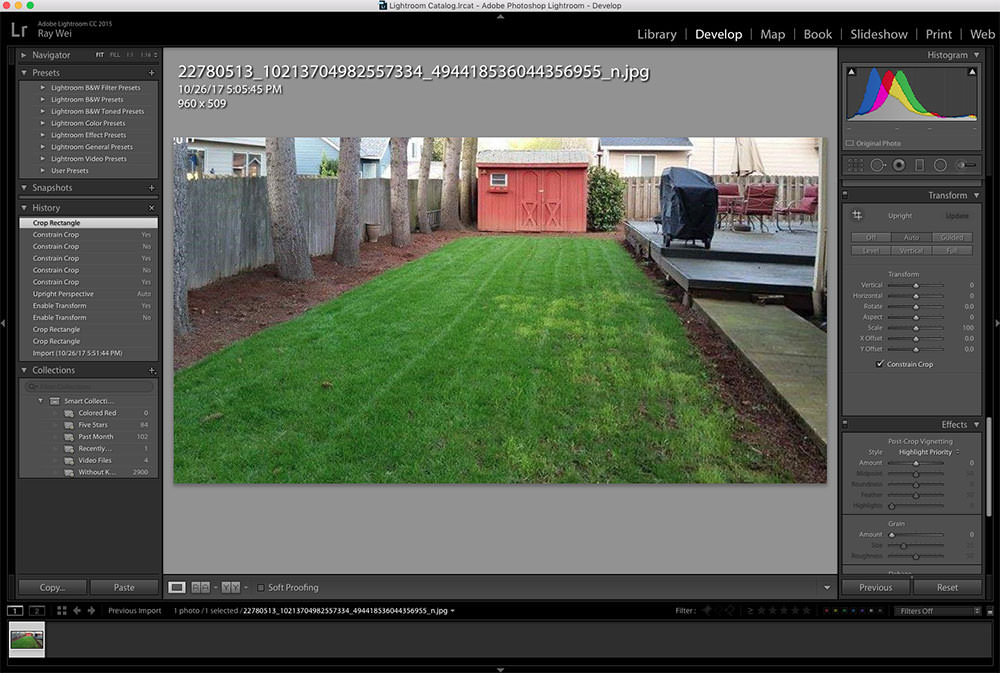
Be aware that straightening tilted photos after the shot leads to slightly lower resolution because the photo is cropped. We recommend achieving optimal lighting, framing, and exposure before clicking the shutter button.
Visit our Property Marketing Guide to learn the same strategies Poplar Homes Property Management uses to fill vacancies two weeks quicker than the industry average!

Recent Comments